- They asked for a mudroom but I said we can do better than that.


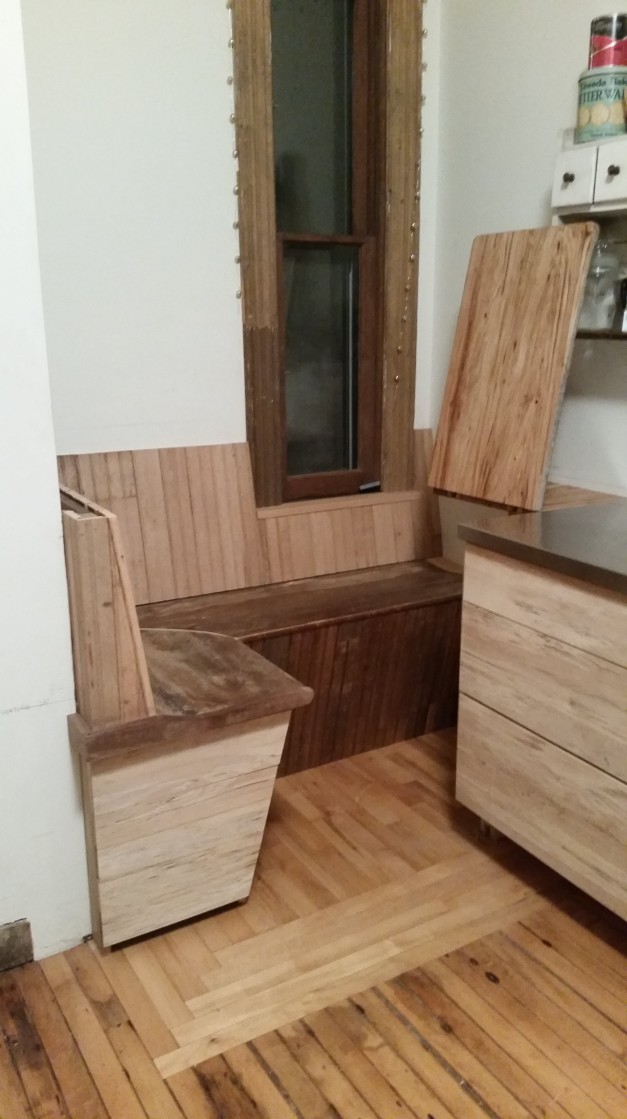
A client ask me to help her design and build a banquette seating area in her kitchen.
The requirements were that the seating have as much storage under it as possible, and that I use all of her reclaimed wood from various sources and some newly sourced spalted hickory and maple.
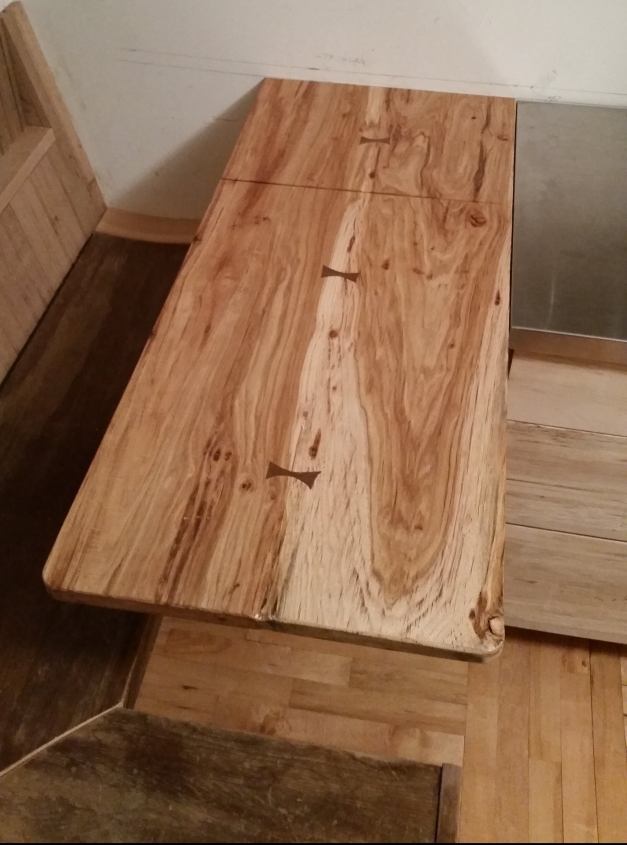
Lift top spalted hickory with walnut bow tie joints.


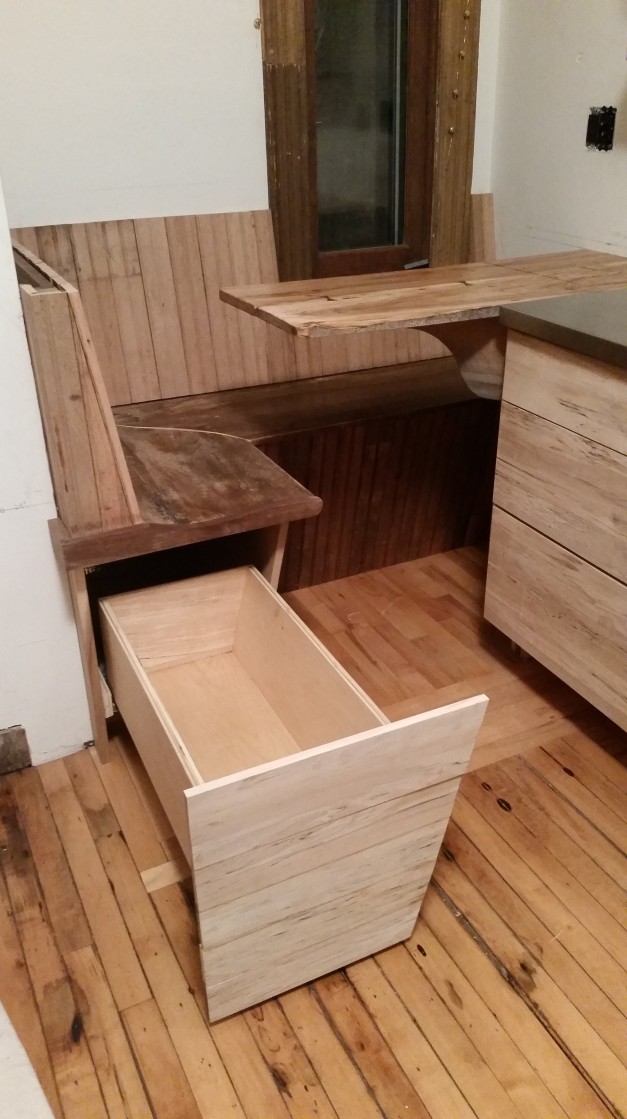
Space for the KitchenAid Stand Mixer and more.
The specifications for this drawer was that it house the stand up mixer and its bowls. To support the weight I used KV 120-lb class full extension concealed undermount slides.
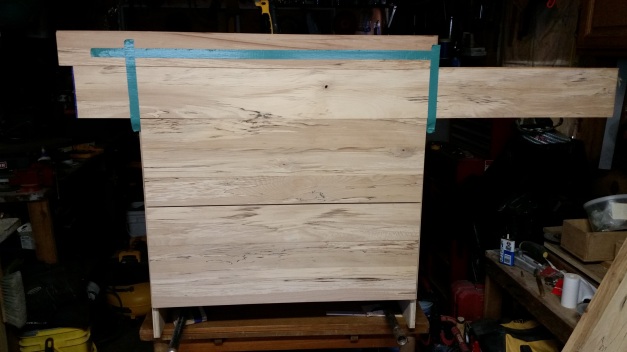
Picking the grain pattern of the spalted Hickory drawer faces.
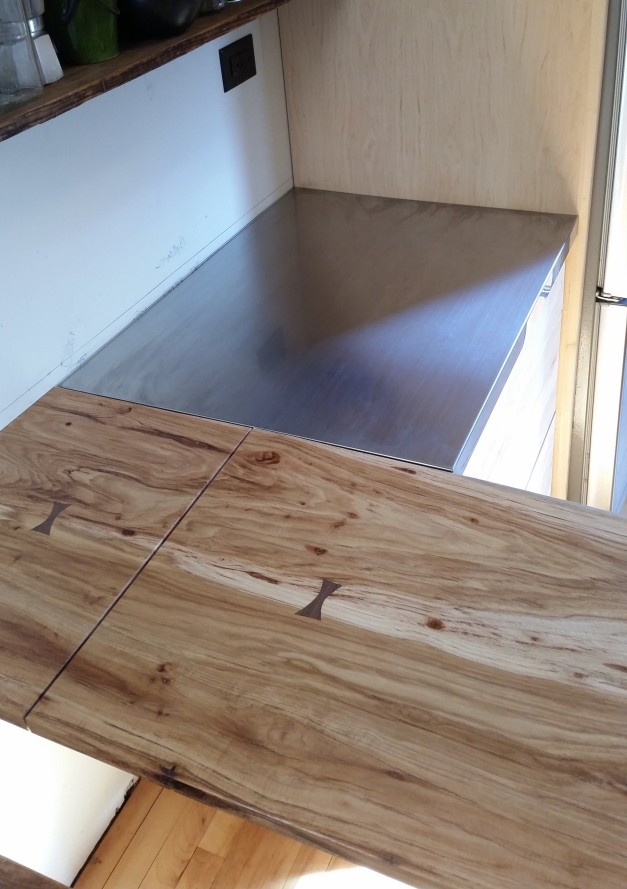
Stainless steel Ikea counter top cut to fit provides a dough prep station.
Doing some hand cut butterfly joints (also know as keys or splines) in a hicory table top that I am making. I say hand cut but I am using a router to cut the basic shape and then I cut the close detail with a chisel and a shape marking knife.

Then glue them up and hammer them in. I have found that a dead-blow mallet is best for this (Not pictured).

Here they are installed and the wood wet down to show the wonderful grain of the hicory.

A return client came to me with an idea for opening up the feel of their stairs. She had often thought it would look much nicer to have iron balusters and wood handrails instead of the drywall. The plan would change the feel of the space to more open and decorative.
Here is what we came up with..


Some clients needed a double sink vanity so I set some nice 1×2″ slate tile and installed two Kohler mirrors, with added outlet inside one, into the wall to go with the Ikea vanity. We upgraded to a dual-flush toilet to help save some water also.

Sometimes you need to cut a contour of tile or maybe a piece of molding. The best way to do this is by using a profile gauge.

I will transfer the profile to a cardboard template and make sure the contour is correct. Then you can cut you material from there be it tile or wood on a piece of trim.

There is a type of trim called “backband” that seems to be used frequently with plaster walls. My theory is that it is a simple solution to walls that maybe a little uneven where the trim contacts the wall surface. It also gives you the opportunity to make a lot of contour or profile options when used in conjunction with standard casings.

Here is a simple solution I came up with to make a backband molding using only 3 1/4″ colonial casing material.

Rip it down with a table saw so that your dropout piece is wide enough to be thicker than the trim when turned on edge.
Note: If you wanted the profile to have more contour and detail you could run a router over the flat side of the casing before you rip it on the table saw.

Like this.

Installed.

And here it is with the oak sill.

This is the other molding in the room that I wanted to achieve a similar look to.
These pictures show how a vaulted ceiling can give you some headroom.

Not a low ceiling but certainly not the headroom we would like.

Joists cut out and sistered. Lots of hidden space up there.

This picture shows the drywall, lighting, new casement window. The new economical plywood flooring is being installed. You can just make out the storage loft. By this point we were storing door up there to reuse.

Original Bench not so very good
So the clients asked me if I could rebuild this rotting down front porch bench. I said I’d give it a try. The old one was made of pine, not even pressure treated, and painted. I noticed the back seemed to be a bit rigid and the ‘design’ did not look very comfortable. I proposed to make the new one out of Ipe and to soften the design a little in hopes of making it easier to look at and sit on. The back got some camber and the leading seat slat was pitched down a few degrees to make it easier on the back of the leg.

2.0 is Ipe and hopefully a more pleasant design.
I was able to use a lot less material because the Ipe is so very strong. This really is only evident in the ends and the back supports. Both were constructed as units and glued with polyurethane glue prior to assembly. The armrest faces got a little customization so they would conform to the stonework.


I designed this table and had the maple top glued up by Owl Hardwood Lumber to match the clients existing countertops. I made the struts from some rather large pieces of fir. After two finish product tries (hard oil and spar urethane) I finally got a winner down. Super hard two-part waterborne urethane called Glitsa.

 Cabin Porn
 Katrin Asbury and some Shawn Greene Artwork
 Oh Beautiful Beer
 Scrap Hacker DIY Ideas
 ~ Re-shaping our Footprint
 ~ Some nice design ideas